This is a rough draft post - please leave comments about how it can be made clearer and improved! Thanks! - Nathan
One major problem photographers face is shooting scenes have have too much difference between the dark parts and the light parks of the scene. For instance, how do you take a picture flowers during sunrise? The sky is really bright and getting all those wonderful warm tones from the sun rise, but the sun isn't "up" yet (obviously) and those flowers that you want to give the picture some interest are way to dark for your camera to take a picture of both of them.
This was exactly the problem that I faced a couple of weeks ago and I'm going to show you how I solved it.

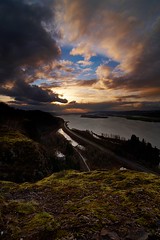
The Foreground

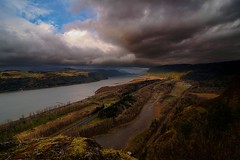
The Background
Step 0) Take two pictures
Back in the "good ol' days of film", photographers would uses graduated neutral density filters to "even" out these types of problems. These were pieces of glass with one side dark and the other side light. They would put the dark part in front of the brighter part of the scene, toning it down to where the darker part was. You can certainly still do this in a digital age (I know several people who do), but you can very easily get the same effect, after the fact, with little work. The advantages to doing it after the fact are you get all kinds of opportunity to mess it up and try again and you can perfect it each time for each image. So...here is how you do it.
You need to take two pictures - one that has the dark part looking "right" and one that has the light part looking "right". If you are shooting in RAW and the scene works for it you can take one picture and develop the RAW file with different exposure settings to get this pictures. If you don't know what RAW is, take two pictures. In taking these two pictures the camera really needs to be on a tripod because you need these images to line up perfectly.
At this point you have two versions of the same image, one with the foreground looking correct, one with the background looking right. We need to put these together into a single image.
Load up both the foreground and the background into your favorite photo editor. They need to be loaded into the same image on different layers.
Step 1) Add a layer mask to the top layer.
Most editors have some sort of "mask" option if you right click on the layer. If you've never used a mask, you'll love it. Masks have to be the most flexible way of blending two layers together. A mask lets you "paint" away the part of the layer your want transparent. The areas of the mask that are black make that part of the layer transparent, where the areas that are white keep that part of the layer opaque. Shades of gray are partially transparent. That's where the magic is. You can paint, cut, copy, paste, blur, smudge, whatever you want to the mask without damaging the actual image. This is going to let you quickly create a complex blend between your layers.
Step 2) The basic blend
Find your editors gradient tool and make sure it is set to a basic black to white gradient. Now pick the area of your image that you will blend. For the example image, its going to be the area of the meadow in the distance, but not really the sky part. Now, on the layer mask, draw a gradient in the area you want to blend. It should look something like this:

Play with this a couple of times until you've got something that looks "pretty good". In my case it looks like this.

Step 3) Smudge it, smudge it and then smudge it some more
If you are satisfied with the basic blend then don't feel like you have to continue with these steps. However, these other steps can really fine tune the blend. Anyway, grab the smudge tool and a huge (300+ pixel radius) fuzzy brush and smudge the mask so that it doesn't look as "harsh". Parts of the transition that seem too dark should probably get smudged to make it lighter, vice versa for light areas.
This step should be quick and natural and sloppy. Don't think to hard about how you are smudging it. If you smudge it too far one way just smudge it back, but the goal really is to sloppy up the gradient. My mask looked like this when I was done with this step.

And my image now looks like this...

Step 4) Gaussian Blur
At this point it probably looks pretty good but there are areas that seem kind of harsh in the transition. To fix this, run the mask through a Gaussian Blur filter with the radius set to 300-600 pixels depending on taste. This will even out all that smudging you did and leave you with a silky smooth, but not even transition that has been hand tweaked to give you the best possible results. In my case the mask looked like this...

If you run it through the blur and it doesn't look right, go back to step 3 and smudge some more...or use a smaller radius. Play around with these steps to get a feel for how they behave.
Step 5) Final Touches
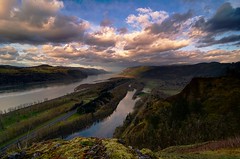
After you are satisfied with the transition, merge the layers together. At this point I like to run it through any additional processing, or at the very least adjust the curve just a little. I find that doing "something" to the whole image after blending, makes everything more "cohesive" and the image just works better. So...my end result, after blending and a minor curve adjustment looks like this.

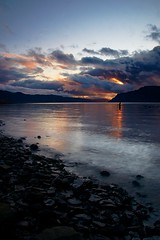
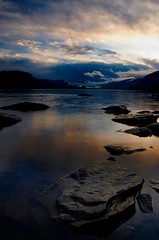
I often use this technique if the scene is too dynamic for me to capture, or if my raw processor can't pull the details out to my satisfaction. Here are some other photos that have gone through similar processes (click for full size):