
"Did I look miserable?"
"Yeah."
"Good! I want something to show my kids some day."
A couple of weeks ago, my brother, dad and I did a bit of backpacking in the Mt. Washington Wilderness. We had been planning a trip in the Mt. Jefferson Wilderness for weeks when we heard that a storm would be blowing in on our first night. Because we were planning to have a late start and 40 mile an hour gusts, at 1am, on the side of Mt. Jefferson didn't sound fun (or really even all that safe), we decided to start a day later, hopefully miss the storm coming through and do a shorter, 2-day trip through the Mt. Washington Wilderness.
Looking out over the lava beds
So, we start out at McKenzie pass, with the rail falling sideways, and go trekking through the lava beds. As if to mock us, while we were getting soaked, it wasn't raining at all just a couple miles to the east. About a mile in, the trail was sheltered enough for me to snap three or four pictures before the lens was covered with rain drops. This would be the last section of trail with any kind of visibility we would see for a long while. We continued our climb through the lava beds and the higher we got the harder the wind blew and the harder rain fell and the more the visibility dropped. When we hit the tree line, and the welcome shelter from the wind and rain, we had walked right past Belknap Crater (6,872 feet) and Little Belknap Crater (6,305 feet) and simply didn't see either one of them. We plugged on for several more miles before deciding to wait out the rain in the tent.
We soon discovered that the tent leaked.
After waking up wet and putting on wet boots and wet...well you get the idea (if not, see the picture at the top of the article for a visual reference), we continued around the base of Mt. Washington.
Into the Mist, On the base of Mt. Washington
Day two started off great. That is to say, the rain wasn't coming down sideways and their wasn't as much of it. The base of Mt. Washington sure was pretty in the fog, although we never did see the mountain.
Zach, Resting at the Lake
As we continued, the weather got better and it turned into a nice day to be out for a hike. After realizing that we were a bit ahead of our scheduled pickup, we took it slow and easy for the last few miles, stopping for a bit to enjoy places like the little lake pictured above.
In the end it was a good trip. Very wet. But, I enjoyed it, I like the pictures I took and I would totally do it again next time.
September 5, 2008
Backpacking the Mt. Washington Wilderness


September 3, 2008
Shinji & Vanessa
A couple of weeks ago, I had the pleasure of shooting an engagement session for my friend Shinji and his bride-to-be Vanessa. The engagement session was kind of a last minute thing, shot two weeks before the wedding. We decided to shoot it primarily for two reasons; the first being, my wife Alycia (you may have seen her picture) was going to be shooting the wedding with me and was looking for as much experience as she could get before hand. The second reason came from a conversation with Andy and Elisha at e[a] studios about how much more relaxed the wedding pictures are when you get the couple in front of the camera before the wedding. After having a "NO DUH!", "Shoulda had a V8" moment, we promptly called up Shinji and Vanessa and suggested meeting up at Edgefield, to which Vanessa responded "OH! Edgefield!".
So one hot August evening, we all wandered around Edgefield and had a blast taking pictures of these guys. After a while, they relaxed in front of the camera and when time came to take pictures at the wedding, they were totally relaxed.
Here are some highlights from the session.


August 6, 2008
Into the Sun
More and more often, I find myself breaking one of the "rules" of photography and pointing my camera into the sun. While, typically, this results in a dark and/or washed out subject with awful ghosting and lens flare, if embraced as a stylistic decision, shooting into the sun can add a lot of character to a picture.
The popular advice is to shoot with the sun behind you and let its light light up whatever you're taking a picture of. And that is all fine and good, but like most "rules" in photography, knowing the rule is less about following it to the letter and really more about knowing how to get away with breaking it. Knowing what happens under these situations (i.e. pictures into the sun end up washed out with lens flare) is the first step towards using for your own devices.
For this picture of daylilies, I purposefully shot into the sun. Did you notice the prominent lens flare, the washed out areas and the darker subject mater? All those trademark "I shot into the sun" characteristics are quite clear in this picture (just in case you missed the big ball of fire in the sky). Now, did you notice what we gained by shooting into the sun? The semi-transparent daylilies are all lit up and glowing from the sun and all those trademark characteristics come together and add a bunch of drama and contract into what could otherwise be a flat, standard, boring flower picture.
Not all pictures into the sun have to be so over the top. Take, for example, the picture of my mom at the top of the article, which has been reproduced here for your convenience.
In it you have the same trademarks, but much more subdued. The lens flare is smaller and adds a subtle, warm feel to the picture, while the subject is only mildly washed out and isn't overly dark. By framing the picture without the sun, its effects are limited to the light spill hitting the edges of the lens and end up significantly diminished. Also because of the lack of the sun in the frame, the look of this picture could be totally changed by adding a lens hood or shading the lens with your hand. All in all I really like the way the warm tones from the flare and washout combine with the sunlight hitting her hair to enhance the portrait.
Another option for reducing the washout and flare is to block the sun with something. In this case, I decided to block it with my brother's head. Not only is he keeping the sun out of my eyes and saving me twenty bucks on sunglasses, he's got this great "wrap around" light that lights up his hair and separates him from the background. Also, he's got some great light hitting him, as it's sunlight that's bouncing off the trees and buildings behind me. Bouncing a light is a really effective tool to make a relatively "small" light (in this case the sun - yes it's small, did you notice that his head is blocking the whole thing?) into a "big" light (the trees and buildings behind him cannot be blocked out by his head, therefore they are big). The advantage of bigger lights is they are softer and provide a more flattering light for your subject.
While shooting into the sun is something that can get over used, cliché or produce some really nasty pictures, it is something that can be used to enhance a photograph. I quite like the results I've had with it and will be refining my technique until the rain returns in October.


August 3, 2008
Underwater
Another picture from last weekend's pool fun. I hadn't done "pool pictures" before and was looking to get more familiar with my new camera, so I got it out and started taking some shots with it. Before I knew it, everyone was really into it and we were all having a blast.
This is my brother Zach, enjoying the refreshing pool. To get this shot, I had to stand on the diving board and lean towards the pool (kinda scary with a brand new camera, but totally worth it!) while he swam underwater from one end towards me. This was snapped half a second before he surfaced.
This was tricky to get something that looked "right". If I took the shot when he was too deep, the water would distort him in odd ways and you would have a silly putty Zach, run over by a dump truck and tossed in the river by the mob look. If he blew bubbles, I would have a great picture of "Bubble Face". If I wasn't careful in my positioning and framing the sun reflecting on the water (I forgot my polarizer, and no I don't want to talk about it) would make it look like some helicopter was shining a spot light on him so the FBI agents on the ground could swoop in and make the arrest.
Having worked through those challenges, I'm quite happy with the picture I've made. It's not often that every time I look at a picture I go "wow, I love that picture" and even rarer is it one of mine. But when it is, I love that feeling. They aren't always my "best" pictures, but they always are special to me.

August 1, 2008
Backyard Baseball Dreams

These days its rare to see Jon with out something relating to baseball. Even though his season is over, he is always up for some catch, practicing some pitching or working on his batting.
After playing catch with everyone he could talk into it, he laid on the grass and tossed the ball to himself.
I remember doing that, how relaxing it was to toss a ball up in the air and catch it, then do the same thing over and over ... excuse me, I think I need to go find a baseball.
July 31, 2008
Anticipation
I couldn't let July pass me by with no post. It's funny, I have so many pictures on the way and no time to put them up here. Until I find the time, you will have to be satisfied with a quick post.
This is the view you see before diving into my Grandparents' pool. We were able to spend this last weekend with them and enjoyed a fair bit of swimming while we were at it.
More on the way!

June 13, 2008
The Evolution of 'Idea'
I'm going to do something a little bit different with today's post. I'm going to take a shot at describing how I expand an idea into a photograph.
The first thing for an evolving idea is to come up with the idea in the first place. Well, that's not entirely true. Even before that you have you have to have a problem. Ideas are a response to a problem. My problem came in the form of "I want a picture of my new lens and I want it to look good". Problem established: make it look good. So, I made it look good. Ideas are easy as pie when you work things out like this!
Ok, so it wasn't quite that easy. I had to take two pictures.
Or three.
Or five rather.
Or more then five, but let's leave the actual number up for debate.
The point is that deciding that you want to make it look good isn't enough. You have to answer the question of how. The answer to this question is your idea. The problem should be thought about, pondered, sketched out, debated and so on and so forth. Once you have an idea that is "workable", that is to say enough of an idea to do something, you can move into the do something phase.
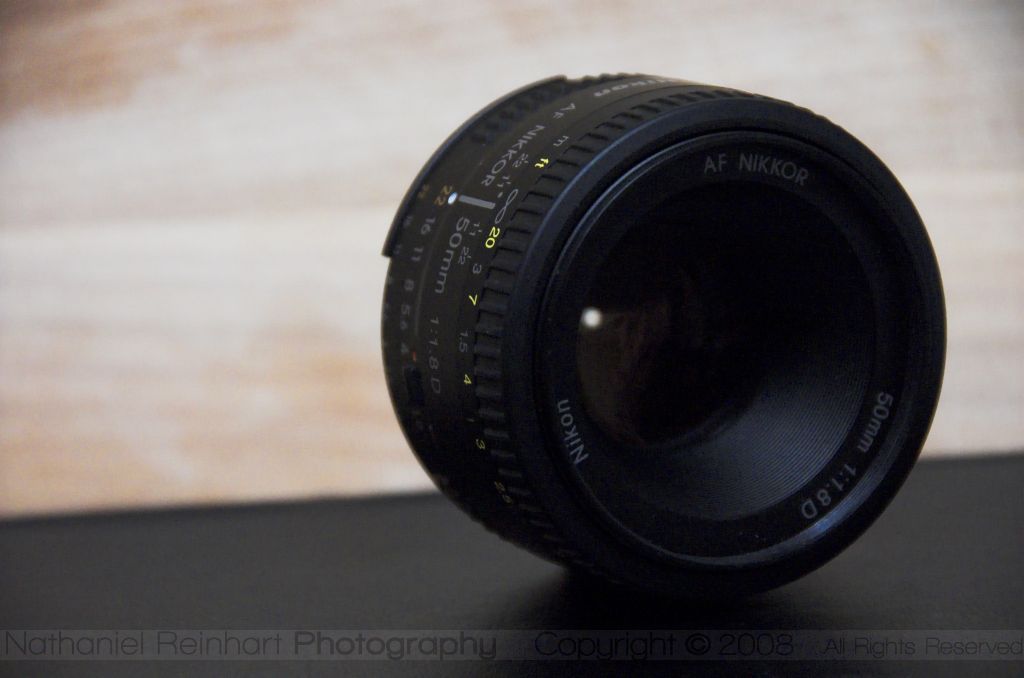
So, back to taking a picture of my lens. My workable idea ended up something like this, "I want a shallow depth of field and I'll put it on a black surface with wood in the background." Not overly complex, maybe not the most original or the greatest but it's a good starting point and more importantly its workable. So I set up that shot and took this picture:
Ugh. Not what I wanted. Back to the drawing board, right? Not quite so fast, there are a significant number of things we can get out of this picture. I do like the black surface, but let's lose that ugly wood and I don't like the framing or how the lens is sitting.
Stop.
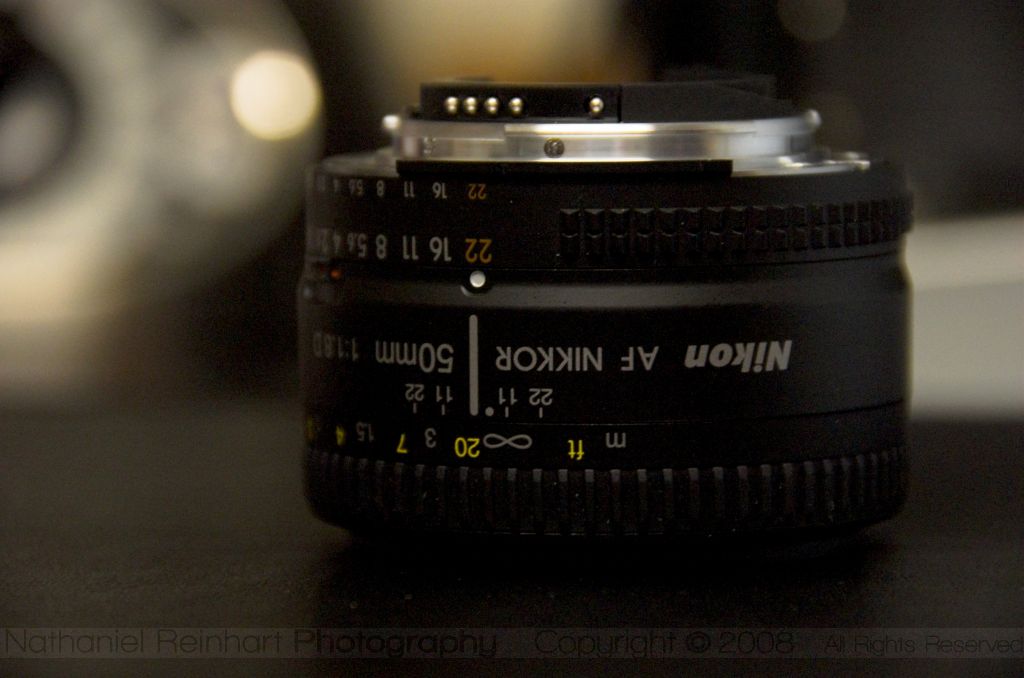
Did you catch that? The idea just evolved, based on what was working and what wasn't. This is key. Experiment, evaluate, repeat. So, I made some adjustments and took this:
Ok, so the wood is gone, that's a big plus! But you know, I kind of liked it on its side and wouldn't it be great if it was reflecting off the black surface? You know, I like where this is going, but let's put the camera on a tripod and drop in some flash to have some better lighting and a better quality picture. The idea evolves, adjustments are made, and another picture is taken.
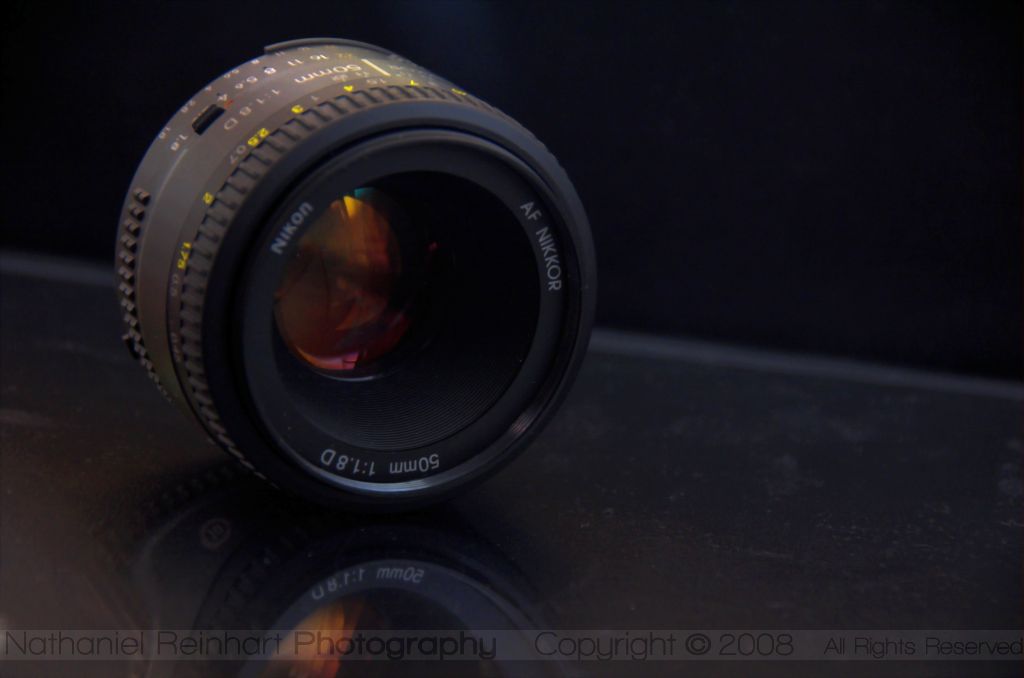
Hey, my knees just might willing to forgive me for that abuse I put them through! And that flash really added a lot, but that background just doesn't do it for me anymore. Let's drop in a black background. Evolved, adjusted, new picture.
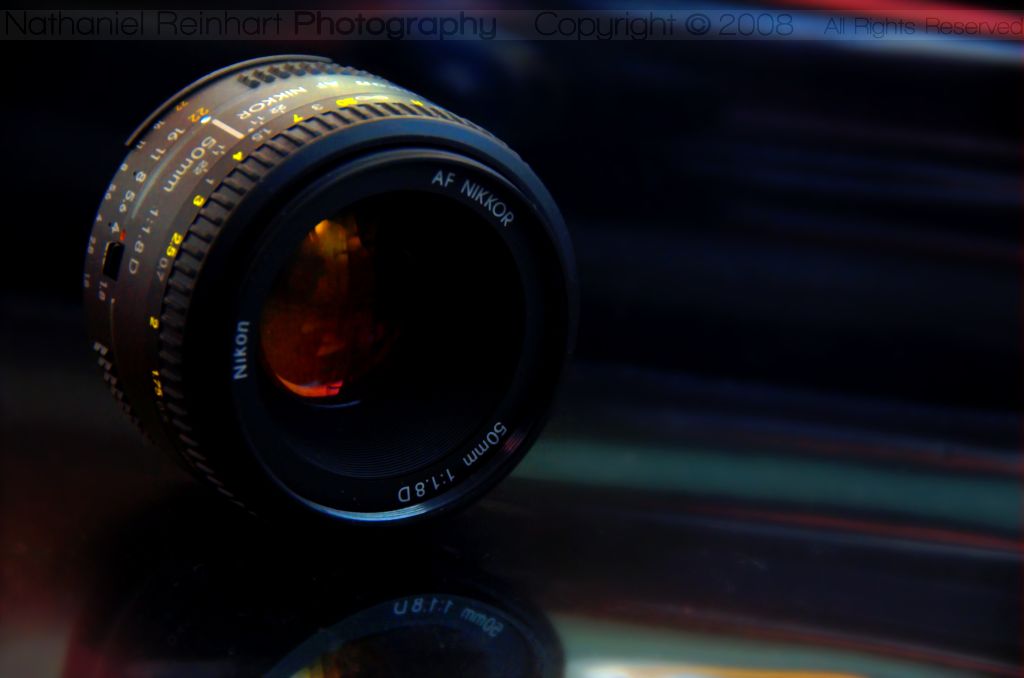
Nice. But, now there is a funky difference between "shiny black" and "black". Can we just make the whole thing "shiny black"?
Hey! How about that? It's a picture of my new lens and it looks good!
Ideas, in particularly good or great ideas (not that this one is particularly revolutionary) are the result of iteration upon iteration of identifying the problems and trying it again. They are rarely the result of a spontaneous epiphany, but instead are the product of hard work.
I find that it is much better to build upon a bad, but workable idea then to sit around waiting for the perfect idea to hit. That isn't to say that doing your homework ahead of time isn't important, but that experimentation, being flexible with your ideas and learning from your mistakes will go along way.
I'll finish this up with a couple of pointers for evolving your ideas:

- Plan out your idea before hand. Think about it. Sketch it out. Mull it over in your mind. Only then try and execute it.
- DO NOT be overly attached to your plans or to the previous ideas. They had their shot, but now it's time to build on top of them. They served their purpose in getting you here, but keep moving forward.
- Do not edit in camera. DO NOT edit in camera. DO NOT EDIT IN CAMERA! Just because you think that you are going down a good path does not mean that you are. That shot that just wasn't what you wanted, could end up being your best shot in the set. Just because you hated it on the camera does not mean that you won't love it on your computer.
